
Dr. Alan Whitfield, Senior Health and Science Editor.
You are standing at the bathroom mirror turning your hand under the light, watching a chip lift off the edge of your thumbnail on day three, even though the bottle promised gel-like shine and salon-level wear. Somewhere in a drawer is a graveyard of half-used polishes that all made the same promise. Here is the useful part first: most bottles labeled “gel-effect” contain no gel chemistry at all. They rely on fast-evaporating solvents and cross-linking resins that mimic the look of a UV gel manicure without the lamp, which means the difference between a polish that lasts and one that does not usually comes down to formula details you can actually check before you buy, not luck. This guide walks through what that label is really telling you, how the shine and hardness happen chemically, and where your own application habits matter more than the price on the shelf.
- “Gel-effect” is a marketing description, not a chemistry claim. Unless the box says it cures under a UV or LED lamp, the polish air-dries like a traditional lacquer, just with different resins.
- Prep and coat thickness affect wear more than brand loyalty does. Two thin coats over a dehydrated, oil-free nail plate consistently outlasts three thick coats on a rushed manicure.
- Humidity and dry indoor heat change how long any polish holds, which is why the same bottle can feel like a holy grail in July and a disappointment in January.
What The Bottle Is Actually Telling You
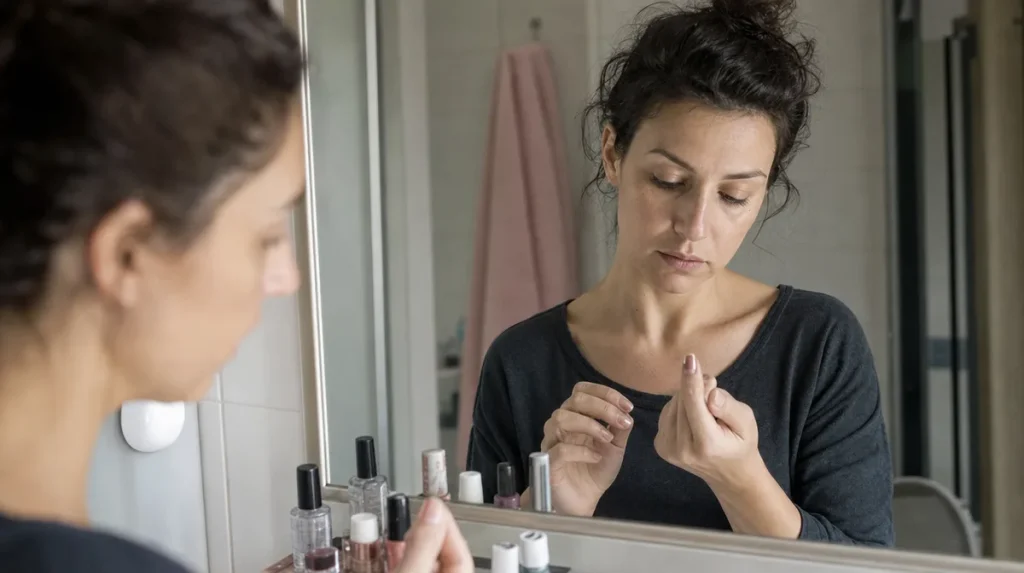
Turn a bottle of gel-effect polish around and the ingredient list reads almost identically to a standard lacquer: nitrocellulose, a plasticizer, a resin, and a solvent that evaporates on contact with air. The word “gel” describes the finish, a thick, glassy shine, not the drying method. True gel polish cross-links under UV or LED light and stays liquid until it is cured. If the label does not mention a lamp, you are looking at an air-dry lacquer engineered to look like one.
That distinction matters because the two systems fail differently. A true gel chips in sheets when the bond to the nail plate breaks. A gel-effect lacquer wears thin at the tips first, the way regular polish does, because it is still a film sitting on top of the nail rather than bonded into a hard shell.
A simple household comparison: a true gel is closer to epoxy, it needs a chemical trigger to harden fully. A gel-effect lacquer is closer to a fast-drying spray paint, it just needs air and time. Neither is better across the board, they solve different problems, but knowing which one is in your hand tells you what kind of wear to expect and when to reapply.
How The Shine And Hardness Actually Form
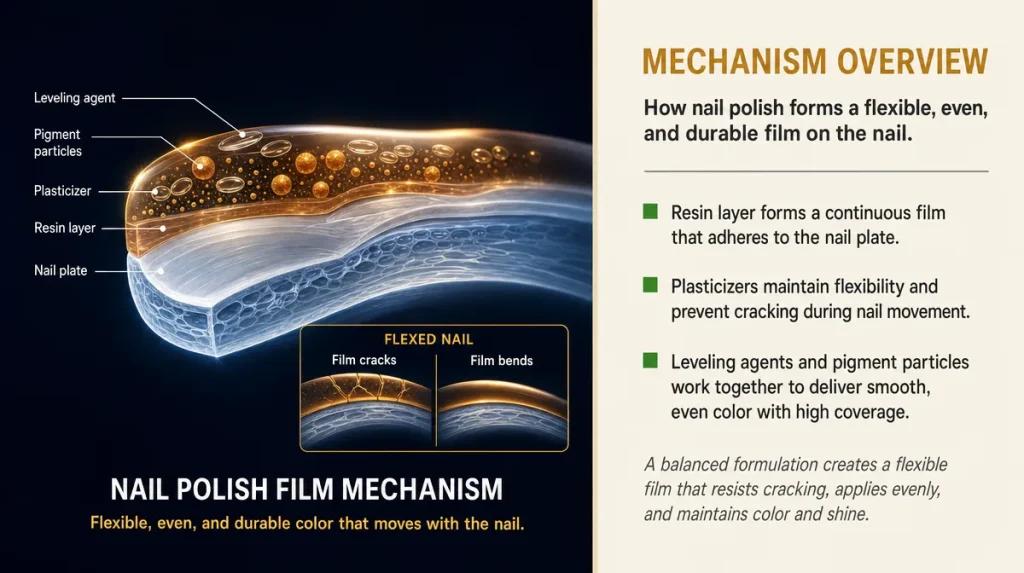
Once the solvent evaporates, what is left behind is a thin polymer film. The resin content determines how hard that film gets, and hardness is a trade-off. A film that is too hard resists scratches but chips off in one piece when it flexes with the nail. A film that is too soft bends with the nail but scuffs and dulls within a day.
Formulators balance this with plasticizers, ingredients that keep the polymer film flexible enough to move with the nail plate as it bends slightly with every keystroke or dish washed. A 2023 study in the Journal of Cosmetic Science measured this trade-off directly, comparing film flexibility and adhesion across several nail lacquer formulations and finding that higher plasticizer content improved chip resistance up to a point, after which the shine started to dull faster.
The glassy look most gel-effect formulas chase comes from a high resin-to-pigment ratio and a leveling agent that lets the film settle flat as it dries, erasing brush strokes. That is the actual mechanism behind the “looks wet, dries hard” claim on the label. It is a real optical effect, produced by chemistry that has been around for years, just marketed with newer language.
The Application Method That Actually Resists Chipping
Most wear failures trace back to three steps that get rushed: dehydrating the nail plate, applying coats too thick, and skipping the cure time between layers, even with air-dry formulas.
Start with a nail plate that has no oil or lotion residue. Wiping with an alcohol-based prep pad, the same step nail technicians use before a professional manicure, removes the thin oily layer that keeps polish from bonding well. Skipping this is the single most common reason a fresh manicure chips within a day.
Apply thin coats. A thick coat looks more opaque in the bottle but dries unevenly, the surface sets before the layer underneath does, which traps solvent and creates a soft, chip-prone film. Two thin coats beat one thick one almost every time.
Let each coat set for a full two minutes before the next, even if the surface feels dry to the touch. The visible surface dries first because it is exposed to air; the layer beneath needs more time. Rushing this step is why a manicure that looked perfect at the sink smudges against a car door twenty minutes later.
Finish with a proper top coat, applied to seal the free edge of the nail, the very tip where most chipping starts. Capping the tip with each coat, including the top coat, is a small habit that adds real days of wear.
The Mistakes That Quietly Ruin Wear Time
Shaking the bottle is the most common one. Shaking introduces air bubbles into the polish, which show up as tiny pits in the dried film once the bubbles rise and pop. Rolling the bottle between your palms mixes the pigment back into suspension without adding air.
Applying lotion or cuticle oil right before painting is another. Both leave a thin film that keeps polish from bonding to the nail plate, which is part of why a manicure done right after a shower, when hands are freshly moisturized, tends to peel faster.
A third mistake is ignoring the free edge. Painting straight across the top of the nail without wrapping the brush slightly under the tip leaves that edge unsealed, and the tip is where fingers make contact with everything: keyboards, car doors, zippers. It is almost always the first place a manicure fails, regardless of how good the formula is.
Finally, storing polish somewhere it gets direct heat, a car dashboard or a sunny windowsill, thins the formula over time and changes how it dries. A bottle that has gone gloopy from heat exposure will apply unevenly no matter how careful the technique.
How To Judge Results Honestly, And When To Check
The fairest test of any polish is a five-day check, not a same-day photo. Day one tells you almost nothing; nearly everything looks glossy and even right after application. The real information shows up between day three and day five, when tip wear, dulling, and the first small chips appear.
Look specifically at where the wear starts. Chipping that begins at the tips of the nails, especially the dominant hand, is normal mechanical wear and not a formula failure by itself. Chipping that starts in sheets from the middle of the nail, or lifts as one continuous piece, points to a bonding problem, usually oil residue or a skipped prep step.
Dulling is a separate issue from chipping. A polish can hold its shape for a week and still lose its shine within two days if the top coat lacks enough resin to resist household abrasion, dish soap, hand sanitizer, and repeated hand washing all break down a top coat’s shine faster than most people expect.
A reasonable benchmark: a well-applied gel-effect lacquer on non-dominant-hand nails should show minimal tip wear at day four. If chipping shows up earlier than that consistently, across more than one bottle, the issue is more likely technique than any single product.
What Matters Versus What Is Just Marketing Language
“Big 10-free” or “big 12-free” labels tell you which common irritants and questionable solvents, like formaldehyde, toluene, and dibutyl phthalate, were left out of the formula. That is a genuine, checkable claim, and the American Academy of Dermatology has published general guidance encouraging people with sensitive skin or nail conditions to look for formulas free of common nail polish allergens. It is worth reading the actual ingredient list rather than trusting the front-of-bottle badge alone, since “free-from” claims are not standardized the same way across every brand.
“Gel-effect,” “gel-like,” and “gel shine” describe appearance, as covered earlier, and say nothing about durability on their own. “Salon finish” is similarly a description of look, not a durability promise.
What does correlate with better wear, based on formulation science rather than label copy: a dedicated base coat formulated for adhesion, rather than skipping straight to color, and a top coat with a higher resin content than the color coat itself, which is why base and top coats from the same line are often formulated to work together rather than interchangeably with any brand.
Price is a weak predictor. A $6.99 drugstore lacquer with the right resin balance can outlast a $22 lacquer with a thinner formula. The chemistry, not the shelf it sits on, decides the outcome.
Why Your Results Change With The Seasons
The same bottle can behave differently depending on the month, and this is not in your head. Humid East Coast summers slow solvent evaporation, which can leave a coat feeling tacky longer and more prone to smudging if you rush the next step. Dry winter air, especially with indoor heating running, pulls moisture out of the nail plate itself, making nails more brittle and more likely to flex and crack a polish film at the edges.
This is worth adjusting for rather than blaming on the product. In humid months, give each coat slightly longer to set before adding the next layer. In dry winter months, a cuticle oil applied at night, not right before polishing, helps keep the nail plate flexible enough that the polish film bends with it instead of cracking.
Seasonal retail moments make this easy to test for yourself. A pumpkin-spice-season manicure done in October, when heating has not fully kicked in yet, often wears differently than the same polish applied in January. If you keep a mental note of which bottles held up through a Back-to-School week of constant hand washing versus a slower August week, you start to learn your own hands’ pattern faster than any general guide can tell you.
Removing It Without Weakening Your Nails
How a manicure comes off matters almost as much as how it went on. Peeling polish off, rather than dissolving it, pulls away surface layers of the nail plate along with it, which is a common reason nails feel rough or thin afterward.
Acetone-based remover works fastest but is also drying to the surrounding skin and cuticle. Non-acetone removers are gentler but need more time and more passes to fully dissolve a well-adhered film. Either way, soaking a cotton pad against the nail for ten to fifteen seconds before wiping, rather than scrubbing immediately, lets the solvent loosen the film so it lifts off in one motion instead of being scraped away.
A simple self-test: after removal, look at the nail surface under direct light. It should look smooth and slightly shiny on its own. A chalky, ridged, or rough texture usually means the polish was peeled off rather than dissolved, or that removal happened too soon after a fresh coat before the film had fully hardened.
General guidance from dermatology sources, including the American Academy of Dermatology, suggests giving nails occasional breaks between manicures and applying a moisturizing treatment to the nail plate afterward, since repeated solvent exposure can leave nails temporarily drier regardless of how gentle the polish formula itself was.
Key Takeaways
Gel-effect polish is a lacquer built to look like a UV gel manicure, not a true gel system, unless the label specifically calls for a lamp. Wear time depends far more on prep, coat thickness, and sealing the tip than on brand or price. Judge results honestly on day four or five, not day one, and separate chipping from dulling since they point to different causes. Adjust technique for the season: give coats more time to set in humid months and keep the nail plate hydrated in dry winter air. Remove polish by dissolving it, not peeling it, to protect the nail surface underneath.
A Quick Checklist Before Your Next Manicure
- Wipe nails with an alcohol-based prep pad before applying any color
- Roll the bottle instead of shaking it
- Apply two thin coats rather than one thick one
- Cap the free edge of the nail with every coat, including the top coat
- Let each coat set two full minutes before the next
- Check wear honestly on day four or five, not the day you paint
- Dissolve polish off with a soaked pad rather than peeling it
- Adjust drying time and cuticle care for the season
This article is for general information and does not replace advice from a dermatologist or nail care professional.
Individual results vary depending on nail condition, application technique, and environmental factors.