
Dr. Alan Whitfield, Senior Health and Science Editor.
You are standing at the bathroom mirror under a bulb that is either too yellow or too blue, holding a bottle you bought because the label promised full coverage and a flawless finish. Twenty minutes later your face looks like a mask that stops abruptly at the jaw, and you are wondering whether the problem is the product or you. It is usually neither. It is the process. A 2021 study in the Journal of Cosmetic Dermatology found that most complaints about foundation, including cakiness and premature fading, traced back to application technique and skin preparation rather than formula quality. This guide walks through the mistakes that show up again and again, the ones dermatologists and makeup chemists see repeated in almost every full-coverage routine, and how to fix each one without buying anything new.
- Shade-matching in one light source is the single biggest cause of visible foundation: daylight and indoor bulbs read color differently, so a match under fluorescent store lighting can look orange or ashy by afternoon.
- Skipping skin prep costs more coverage than it saves: full-coverage formulas grip onto dry patches and enlarged pores, so unmoisturized skin often needs more product, not less.
- Overworking the product after it starts to set is what causes cakiness, not the amount applied: blending stops the moment the formula begins to tack, and touching it further just pushes it into fine lines.
Matching Your Shade In The Wrong Light
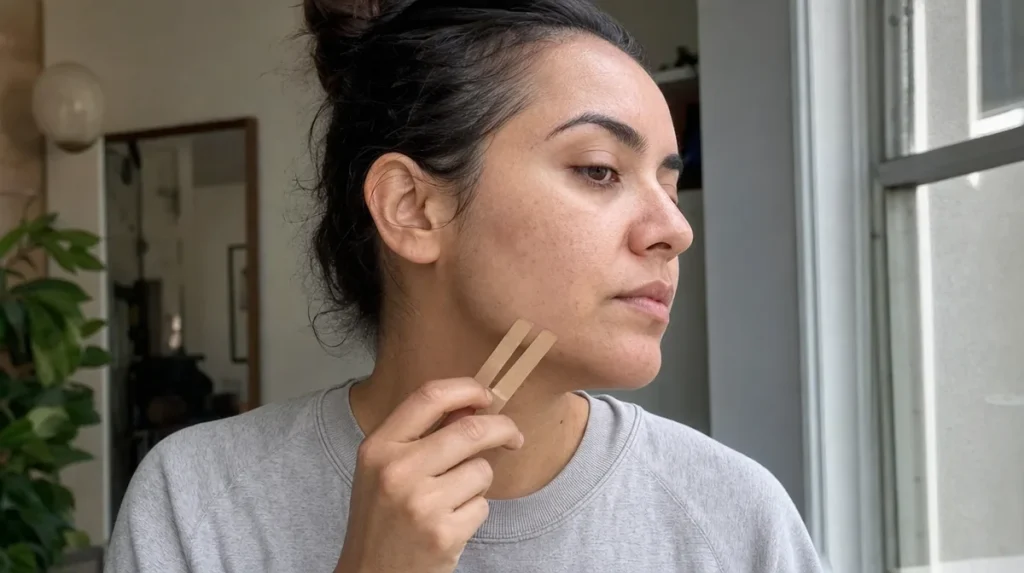
Foundation shade is judged almost entirely by light, which is why a color that looks correct at a Sephora counter can look off by the time you walk outside. Store lighting is often cool-toned fluorescent, while most homes mix warm bulbs with daylight through a window. A bottle formulated in a lab under a defined light temperature will still shift on skin depending on what light is hitting it.
The fix is simple and free: swatch two or three shades along the jawline, not the back of the hand, and step outside or near a window before deciding. The jaw is where foundation has to blend into bare neck skin, so it is the most honest test spot on the face.
A common mistake is choosing a shade slightly lighter than skin tone to look brightening. Dermatologists note that this almost always reads as a visible line at the jaw within a few hours, especially once the product oxidizes. Most full-coverage formulas darken slightly as they interact with skin oils, a process called oxidation. Buying a shade that matches skin tone precisely in daylight, rather than one shade lighter, accounts for that natural shift.
US shade ranges, from fair to light, medium, tan, and deep, are broad categories, and two bottles labeled “medium” from different brands can differ noticeably. Undertone, whether cool, warm, or neutral, matters more than the label name. A quick self-test: hold a piece of white paper next to your bare jaw in daylight. If skin looks more pink or rosy, you likely lean cool; more golden or yellow suggests warm; and if you cannot tell, you are probably neutral.
Skipping The Skin Prep Step
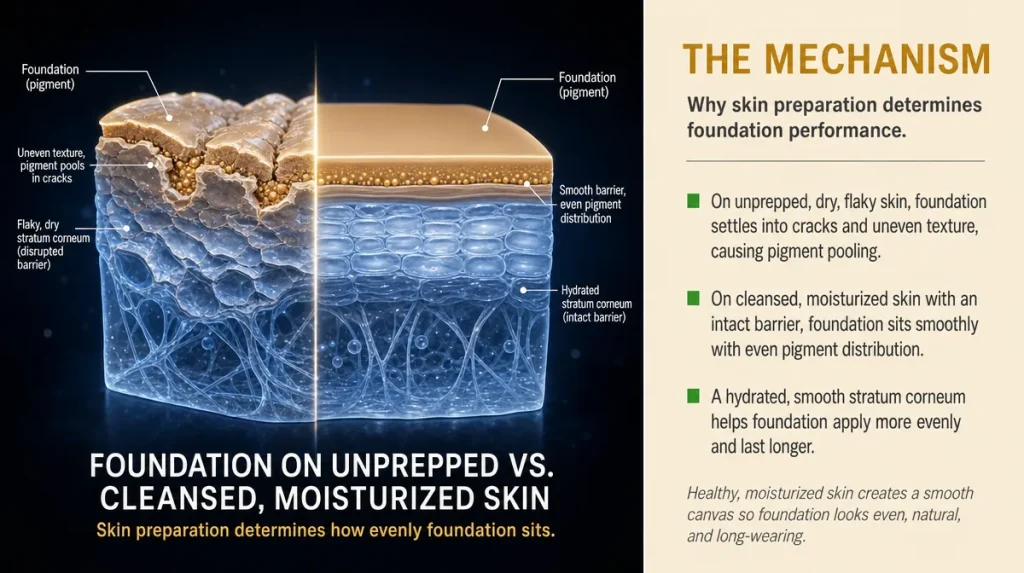
Full-coverage formulas are built to sit on the skin’s surface and mask what is underneath, which means they exaggerate texture rather than smoothing it if the surface is not prepped. Think of it the way a topcoat highlights every scratch left in unsanded wood: the more pigment and coverage a product carries, the more visible any dry patch or clogged pore becomes once it sets.
A basic prep routine, even a short one, changes how the product behaves. Cleansed, moisturized skin gives a full-coverage formula something even to grip, so it sits flatter and needs a thinner layer to look opaque. Skin that is dry or flaking will pull moisture out of the foundation itself, leaving patches that look cakey within an hour, according to guidance published by the American Academy of Dermatology on skin barrier care.
The most overlooked prep step is not moisturizer but time. Applying foundation immediately after a heavy cream means the two products are still sitting on top of each other rather than absorbing, which causes pilling, those small rolled beads of product that appear mid-blend. Waiting two to three minutes after moisturizer, long enough for it to visibly sink in, solves most pilling complaints without changing either product.
For oily and combination skin types, a lightweight, oil-free moisturizer works better under full coverage than a rich cream, since the added weight of two heavy layers is often what causes the look to slide by midday.
Using The Wrong Tool For The Finish You Want
Fingers, brushes, and sponges all deposit foundation differently, and much of the frustration with full-coverage formulas comes from using a tool built for a different finish. Fingers warm the product and push it into skin quickly, which builds coverage fast but can leave visible drag marks with thicker formulas. Dense brushes buff product on in a way that looks airbrushed but can also sit heavily in fine lines if overworked. Damp sponges, bounced rather than dragged, thin out the formula as they absorb some of it, giving a more natural, skin-like finish at the cost of some opacity.
A damp sponge is the most forgiving choice for full-coverage products specifically because the water in the sponge dilutes the pigment slightly as it presses in, reducing the risk of a mask-like finish. A dry sponge, by contrast, absorbs too much product and wastes it.
The mistake that shows up most in photos is switching tools halfway through a section of the face. Blending the cheeks with a brush and the forehead with fingers, for instance, often creates subtle texture differences that are invisible in the mirror but obvious under flash photography or bright office lighting. Using one tool per zone, and blending zones into each other while the product is still workable, keeps the finish consistent.
Applying Too Much At Once
Full coverage does not mean one thick layer. Makeup chemists generally recommend building coverage in thin layers rather than applying the full amount in a single pass, because a thin layer sets faster and more evenly, letting you see the true coverage before deciding whether more is needed.
The common mistake is judging coverage in the first thirty seconds, before the product has had time to settle, and adding more out of impatience. This is how cakiness starts. A layer that looks sheer immediately after application often builds to full coverage within a minute or two as it sets and blends with natural oils. Waiting briefly between layers, checking in a mirror in natural light rather than the bathroom’s overhead bulb, prevents overapplication.
Another overlooked detail: full-coverage formulas are usually more pigmented per pump or scoop than sheer or medium formulas, so a pea-sized amount that felt small out of the bottle may already be enough for the whole face. Using the same amount out of habit, carried over from a lighter formula, is one of the most common reasons people end up with more product than their skin can wear comfortably.
Ignoring Your Neck And Hairline
A face that looks flawless in the mirror can still show an obvious foundation line at the jaw or hairline in daylight or photographs. This happens because most people apply and blend only where they can easily see, which stops at the jawbone, leaving a visible edge where covered skin meets bare skin.
Blending a small amount of product down onto the upper neck and up into the hairline, using whatever is left on the sponge or brush rather than a fresh amount, softens that edge without adding heavy coverage where it is not needed. The ears are another frequently missed spot, especially for anyone who wears their hair back.
This matters more for full-coverage formulas than lighter ones because the contrast between covered and uncovered skin is more pronounced. A sheer tinted moisturizer might blend into bare skin without much thought; a fully opaque formula will not. The self-test for this is simple: after finishing your face, walk to a window with natural light and turn your head fully to each side. Any visible line at the jaw or hairline needs another few seconds of blending before you leave the house.
Setting It The Wrong Way For Your Skin Type
Setting powder and setting spray are not interchangeable, and using the wrong one, or skipping the step entirely, is one of the fastest ways to undo good foundation work. Powder absorbs oil and locks pigment in place, which makes it well suited to oily and combination skin, particularly in the T-zone. Applied over dry skin, though, powder can settle into fine lines and flaky patches, exaggerating texture rather than smoothing it, similar to how flour dusted over a damp countertop clumps rather than sitting flat.
Setting spray works differently, melting the layers of makeup together into a more cohesive film rather than absorbing anything. This suits drier skin types or anyone wearing a matte, heavier formula that needs softening. Using both, a full face of powder followed by a heavy setting spray, often reactivates the makeup and can cause it to shift or streak, especially in humid weather.
Climate plays a real role here. Humid East Coast summers tend to break down setting products faster, so a light dusting of powder in the T-zone with a spray over the rest of the face often outlasts a heavier, powder-only approach. Dry winters with indoor heating pull moisture from skin and makeup alike, so a hydrating setting spray, applied in a fine mist rather than a heavy coat, tends to hold better than powder alone in that season.
Not Adjusting For The Season
A foundation routine that works in April can fail in August or January, and the mistake is assuming the product changed rather than the environment. Full-coverage formulas, by design, sit on the skin’s surface more than lighter ones, which makes them more sensitive to humidity and temperature swings.
In humid months, oil production increases and sweat can break the bond between skin and makeup, causing full-coverage formulas to slide toward the T-zone by afternoon. A thinner initial layer, reinforced later in the day with a small amount of powder rather than a full reapplication, tends to hold better than a heavy morning application meant to last unattended.
In dry winter months, indoor heating strips moisture from the air and from skin, and foundation applied over dehydrated skin can look patchy by midday even if it looked smooth at nine in the morning. Layering a hydrating serum under moisturizer, and choosing a dewier finish for the season, addresses this more effectively than switching foundations entirely.
Fall is often when people restock their routine during pumpkin-spice-season retail promotions, which is also a reasonable time to reassess whether your shade has changed. Summer sun exposure shifts most people’s skin tone slightly, even with sunscreen, so a shade bought in June may need a lighter alternative by November.
Holding Onto Foundation Past Its Prime
Foundation does not last indefinitely once opened, and using an old bottle is a quiet source of application problems that people rarely trace back to the product’s age. Preservative systems in liquid foundation typically hold up for about twelve months after opening, though this varies by formula, according to general cosmetic shelf-life guidance published by dermatology and consumer safety organizations.
A bottle that has separated, changed smell, or thinned in texture is past being reliable, even if it still looks mostly the same. Applying an aged foundation often requires more product to achieve the same coverage, since the pigment-to-liquid ratio shifts as the formula degrades, which in turn makes cakiness more likely.
A practical habit: write the month you opened a bottle on the bottom with a permanent marker. It takes five seconds and removes the guesswork later. Bottles kept in a hot bathroom, rather than a cooler drawer or cabinet, break down faster, since heat accelerates the separation of oil and pigment. Anyone who owns several half-used bottles from past Black Friday hauls likely already has at least one worth checking before the next use.
Key Takeaways
Full-coverage foundation rewards patience more than product. Most of the mistakes covered here trace back to rushing a step: matching a shade under one light, skipping skin prep, applying too much at once, or skipping the walk to a window to check the jawline before leaving the house.
The formula itself matters less than technique, timing, and the small habits that carry over from one season or one bottle to the next without being reconsidered.
A Quick Checklist Before You Leave The Mirror
- Swatch shade options on the jaw in natural daylight, not under store lighting or on the back of the hand.
- Wait two to three minutes after moisturizer before applying foundation.
- Build coverage in thin layers, checking after each one settles rather than judging it wet.
- Blend down into the neck and up into the hairline, then check both in a window’s natural light.
- Match your setting method, powder or spray, to your skin type and the season.
- Write the opening date on any foundation bottle and retire it after about twelve months.
This article is for general information and does not replace personalized advice from a dermatologist or licensed esthetician.
Individual results vary depending on skin type, climate, and application technique.